Mercury 40HP 2-Stroke Outboard Water Pump Repair
Posted by MarineCopkingo on
Mercury 40HP 2-Stroke Outboard Water Pump Repair
Servicing the water pump and replacing the impeller in an outboard motor is standard maintenance that should be done every year.
Replacing the impeller in your Mercury outboard helps ensure your outboard’s cooling system works perfectly, protecting the motor from overheating. Watch the video above and follow the steps below to replace the water pump in a Mercury 40HP 2-Stroke motor.
Tools and Parts Needed – Mercury 40HP 2-Stroke Water Pump Repair
Tools
- Ratchet and sockets
Parts

First you’ll need to remove the lower unit from the outboard. Watch the video below to see how to get that done.
Dismantling the Water Pump
Step 1. Remove the four bolts from the water pump housing, then lift the housing up and off the driveshaft.
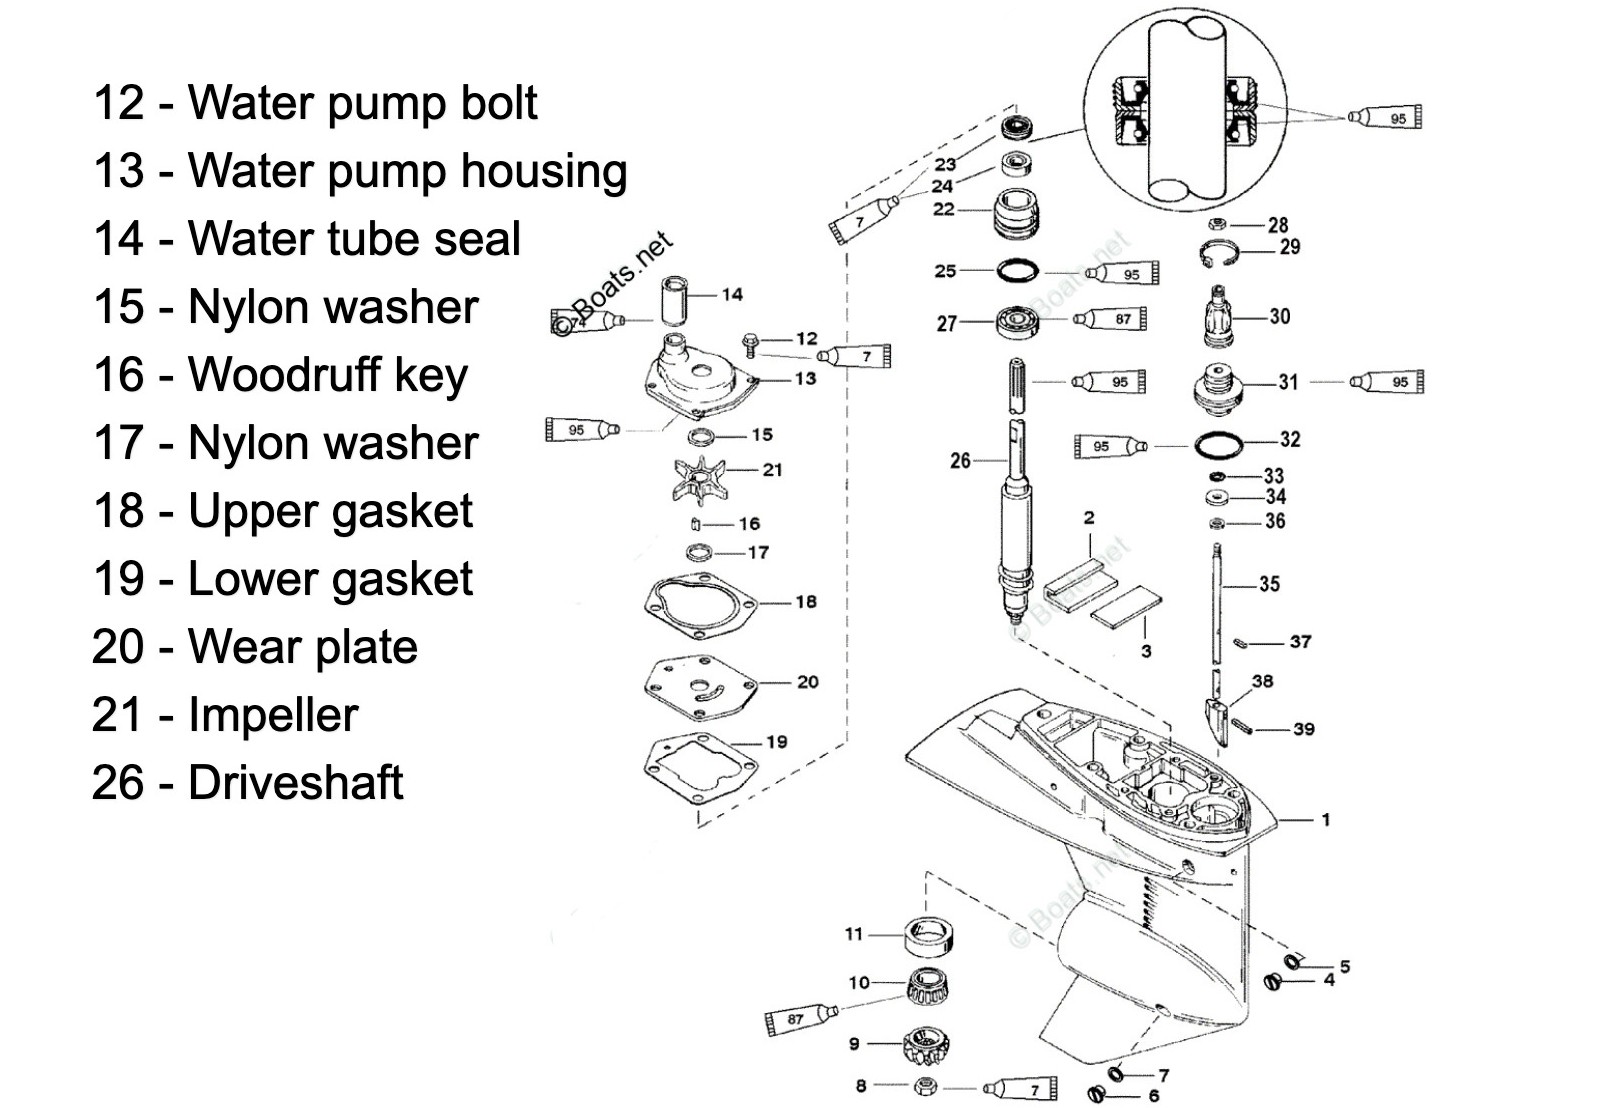
Step 2. Remove the impeller and the two nylon washers (one above and one below the impeller).

NOTE: If the impeller blades are damaged, check whether any pieces have broken off. Find and remove any pieces so they don’t end up blocking the cooling system once the lower unit is reinstalled onto the outboard.
Step 3. Remove the woodruff key under the impeller from the driveshaft.
Step 4. Remove the upper gasket, the metal wear plate and the lower gasket. Carefully scrape away any gasket material from the lower unit if necessary.
Installing the Impeller & Reassembling the Water Pump
Step 5. Install the new lower gasket, the new wear plate and the new upper gasket (all included in the water pump repair kit).

Step 6. Install the new lower nylon washer and the new woodruff key (both included in the water pump repair kit).
PRO TIP: Put a dab of marine grease on the driveshaft to keep the woodruff key in place while you install the impeller.
Step 7. Install the new impeller and the upper nylon washer (both included in the water pump repair kit).
Step 8. Lightly grease the metal wear plate and the inside of the water pump housing with marine grease.

Step 9. Reinstall the water pump housing while rotating the driveshaft clockwise as you press it down over the impeller to ensure the impeller blades are oriented in the correct direction inside the housing. Next, reinstall the four water pump bolts.

Step 10. Install the new water tube seal (included in the water pump repair kit) onto the water pump housing and you’re done.
Copkingo Marine parts Store!